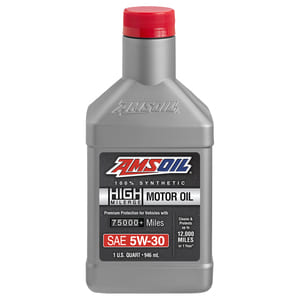
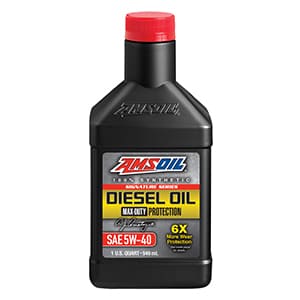
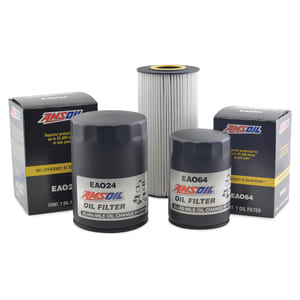
Cranking up your car, you think about its well-being. As life gets busier and engines more intricate, many people now depend on experts for vehicle maintenance. But if changing your own oil still brings you satisfaction, there are some pitfalls to be aware of. Whether you’re a seasoned mechanic or a weekend warrior craving a diy oil change, make sure to avoid these 5 common mistakes.
1) Install the wrong oil

Using the incorrect oil can lead to significant engine problems. When I refer to the wrong oil, I’m talking about the incorrect viscosity, or thickness. Engines have specific oil requirements based on their design and performance needs. For example, if your Ford* F-150* specifies 5W-20 oil, it’s crucial to adhere to this recommendation. Using a different viscosity like 10W-40 can affect the engine’s lubrication, potentially causing wear and tear. This isn’t just a minor detail; the right oil ensures proper flow under various temperatures and operating conditions, maintaining your engine’s health and efficiency.
Switching between diesel and gasoline oil involves some complexities. It’s crucial to ensure the oil used meets the specific requirements of your engine. While you can use diesel oil in a gas engine, it must match the proper specifications for viscosity and performance. This ensures the engine runs smoothly and maintains its efficiency. Always consult your vehicle’s manual or a professional mechanic to verify compatibility. Using the wrong oil could lead to engine damage and costly repairs.
A frequent mistake is choosing any oil other than high-quality synthetic oil. If your engine’s in good condition and you truly care about your car, synthetic motor oil is your best bet. It provides better performance, superior protection, and longer-lasting results compared to conventional oils. Synthetic oil maintains its viscosity better under extreme temperatures, ensuring your engine runs smoothly in both hot and cold weather. While some might argue it’s more expensive, the enhanced efficiency and extended engine life it offers make it a wise investment for any car owner. Furthermore, synthetic oil reduces deposits and sludge buildup, which means fewer oil changes and less maintenance over time. This not only saves money in the long run but also enhances overall driving performance.
Oil is essential for protecting your engine from wear and premature failures. Investing heavily in expensive auto insurance while skimping on high-quality oil doesn’t add up. Insurance is a necessary document that remains idle until an incident occurs. In contrast, oil is constantly working, lubricating engine parts, reducing friction, and preventing damage. It’s the lifeblood of your vehicle, allowing it to run smoothly and efficiently.

Consider this: using subpar oil can lead to increased friction and heat, causing engine components to wear out faster. This can result in costly breakdowns and repairs that could’ve been avoided with proper maintenance. High-quality oil ensures optimal engine performance by maintaining viscosity under various operating temperatures and conditions.
Moreover, poor-quality oil can fail to provide adequate lubrication, leading to sludge build-up, which clogs oil passages and restricts oil flow. This can cause vital engine parts, such as bearings and camshafts, to receive insufficient lubrication, leading to catastrophic engine failure.
In summary, prioritizing quality oil over cutting corners on maintenance is crucial. Protecting your engine with the right oil can save you from unexpected breakdowns and expensive repairs, ensuring your vehicle remains reliable and efficient.
2) Forget to reinstall the oil-fill cap
Neglecting to reinstall the oil-fill cap can have severe consequences. If you forget to secure the cap, hot oil will splash all over the engine compartment, potentially damaging other critical components such as belts, hoses, and electrical wiring. Driving without the cap not only creates a significant mess as oil spatters everywhere when the engine runs but also poses safety hazards, such as increased risk of fire due to oil contacting hot engine parts. This oversight results in a time-consuming cleanup process and necessitates purchasing a new cap, as well as replenishing the lost oil to maintain proper lubrication.

The absence of the cap leads to reduced lubrication, causing increased friction and heat within the engine. Over time, this can result in overheating and serious engine damage, such as worn bearings or damaged pistons. Additionally, decreased oil levels may trigger the oil warning light, prompting premature and unnecessary oil changes, thereby increasing maintenance costs.
It is imperative to always double-check that the oil-fill cap is securely in place after any maintenance. This simple precaution ensures optimal engine performance, longevity, and safety, ultimately saving time, money, and potential mechanical issues down the road.
3) Underfill or overfill the crankcase
Improperly filling the crankcase, whether by underfilling or overfilling, can lead to significant engine trouble. Last year, a friend of mine experienced this firsthand. He contacted me because his car was making an unusual noise and asked if I could help identify the problem. When I listened to the engine, it was clear that there was an issue with the oil level—it sounded like the engine was running without oil. My friend assured me he had just changed the oil, but upon checking, we discovered it was three quarts low.
Given there were no signs of oil leaks and the drain plug was secure, we concluded he hadn’t monitored the amount of oil he added during the oil change. Fortunately, he had only driven the car in this state for one day, which likely mitigated more severe damage. This incident underscores the importance of verifying your vehicle’s required oil capacity and ensuring you have the correct amount of oil ready before starting an oil change.

To prevent such mishaps, always refer to your vehicle’s manual or our Product Guide, which often contains detailed information on oil capacity. After changing the oil, run the engine for a few minutes to allow the oil to circulate properly. Turn off the engine and wait a few minutes before checking the oil level one last time to ensure it’s at the correct level. This final check is crucial, as it confirms that the oil is evenly distributed and at an optimal level, preventing potential engine damage from either underfilling or overfilling.
4) Strip the drain plug threads
Cross-threading the drain plug can lead to considerable issues. While drafting this piece, someone inquired if forgetting to reinstall the drain plug was a mistake worth noting. Indeed, it is a common oversight, often occurring due to distractions. For those changing their oil at home, the error becomes immediately apparent from the sound of oil hitting the ground. However, a more grievous problem involves the improper handling of the drain plug. This issue is especially prevalent in quick-lube shops where workers frequently operate under time constraints. At one well-known quick-lube chain, a speaker disclosed that two to three percent of drain plugs were either cross-threaded or stripped. Such mistakes result in a slow oil leak and pose significant challenges for repair. This statistic underscores the importance of vigilance when reinstalling the drain plug. Additionally, these errors can not only lead to costly repairs but also pose potential environmental concerns due to oil leaks. Therefore, it is imperative to exercise caution and precision during this seemingly simple task.

5) Leave the O-ring behind
Properly replacing the O-ring during an oil change is crucial for the longevity of your engine. Always swap out your oil filter each time you change the oil to ensure peak performance. Here are three essential points to keep in mind:
First, ensure the O-ring is removed with the old filter. Failing to do so can lead to the unwanted scenario of having two O-rings in place, which can cause oil leaks and potential engine damage. Your new filter comes with a fresh O-ring that must be utilized. Double-check that the old O-ring isn’t stuck on the engine’s mounting surface before you proceed.

Second, before installing the new filter, lightly coat the O-ring with some oil. This isn’t just a suggestion; it’s a critical step that aids in creating a proper seal between the filter and the engine. Applying a thin layer of oil ensures that the O-ring does not get pinched or twisted during installation. Additionally, this lubrication facilitates the removal of the filter during the next oil change, preventing it from becoming excessively tight or difficult to unscrew.
Finally, avoid over-tightening the filter. While it might seem intuitive to secure the filter as tightly as possible, this can actually cause more harm than good. Hand-tighten the filter until it is snug, but resist the urge to use tools to crank it down further. Over-tightening can deform the O-ring, lead to leaks, and make the filter extremely difficult to remove in the future. Following the manufacturer’s torque specifications, typically provided with the filter, ensures optimal performance and ease of maintenance.
By adhering to these guidelines, you help maintain the integrity of your vehicle’s oil filtration system, promoting engine health and longevity.

*All trademarked names and images are the property of their respective owners and may be registered marks in some countries. No affiliation or endorsement claim, express or implied, is made by their use.